
 VPN users

Create a VPN user
To create a VPN user, navigate to: "Networking>VPN Users" section of the menu on the left.
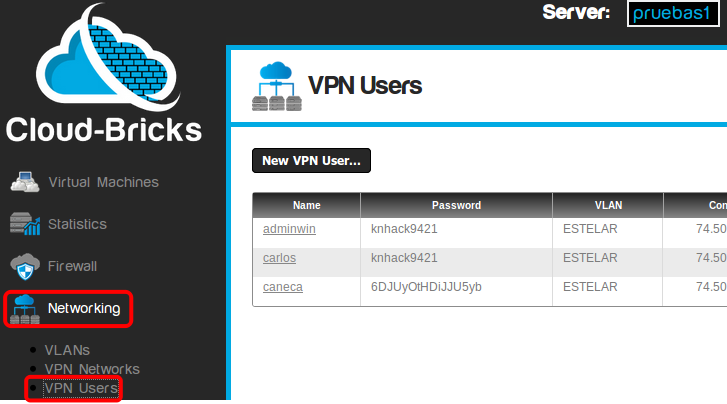
Now click on the "New VPN User..." button.

- User name (login) you want to create.
- Password.
You can use any password, but for security reasons it is recommended to use the auto-generated password. - Choose the VLAN the user will
connect to.
- The "OK" button will temporary save your changes into
memory.
- The "Cancel" button, cancel all unsaved changes.
Do not forget to click on the "Commit changes" button in
order to generate the VPN configuration.

- The highlighted blue icon provides a window to download the
appropriate digital certificates for user authentication.

Configure your operating system
See the following manuals to learn how to connect to the VPN service from different operating systems:
Video Tutorial
Limitations
- A maximum of 15 VPN users per VLAN can be configured.
- From the client side, only one simultaneous VPN connection is
supported for each public ip address, even if the client is
behind NAT.