
The VPN service
is used to connect external computers to a Cloud VLAN, with remote management purposes.
Only the L2TP/IPSEC VPN protocol with digital certificates
authentication is supported.
This manual shows how to connect a Linux Desktop computer (Fedora and Ubuntu) to the Cloud VPN system.
Requirements
To connect to the VPN service ask your system administrator for
the following information:
- File <customer>-VPNCA.crt
- VPN Certification Authority.
- This file can be downloaded from the SSL Certificates, page.
- It can be identified as "VPN INTERNAL CA CERTIFICATE"
- VPN IP address.
- It is the same IP address used to access the Cloud management system.
- It is the IP address corresponding to the name of your Cloud-Bricks node.
- You can get by resolving the name of your node through the nslookup
command, for example:
#nslookup sample1.cloud-bricks.net
- The following data can be obtained from the VPN Users screen.
- File <user>-vpn.p12 (User certificate for the VPN connection).
- File <user>-vpn.key (Private key connection)
- Username and password with permissions to connect to the VPN.
VPN Client in Ubuntu
Install VPN L2TP support
L2TP protocol support is not included in the default Ubuntu installation, so install the corresponding package:
#apt-get install strongswan network-manager-strongswan xl2tpd
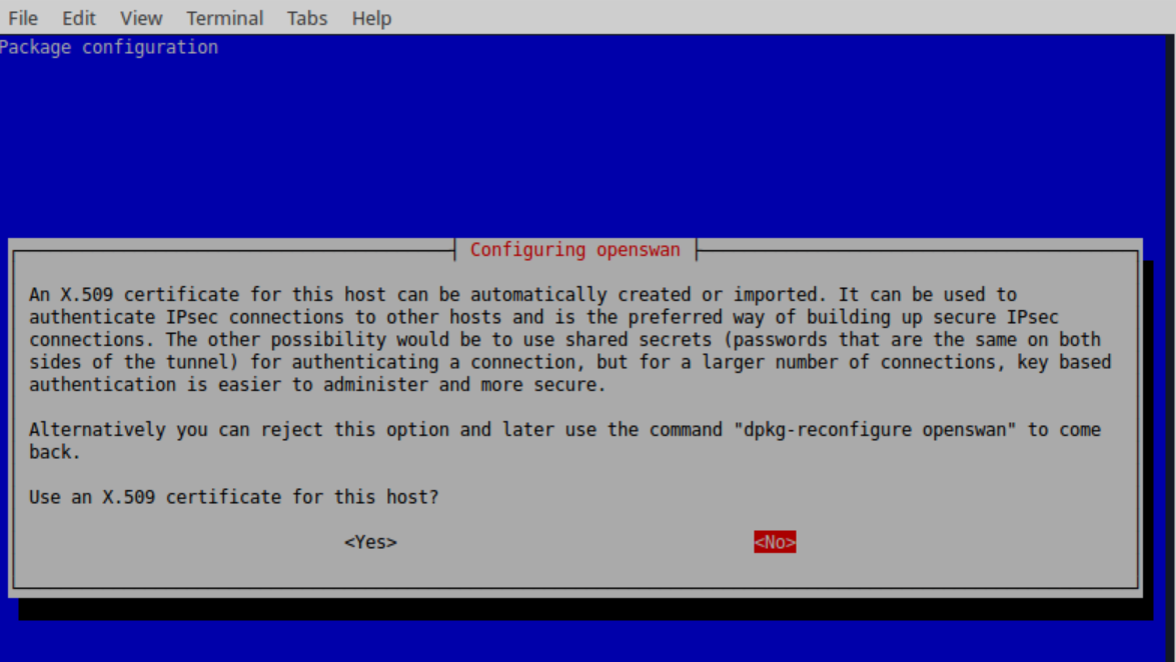
During the installation process Openswan ask to configure a x.509 certificate, select "No".
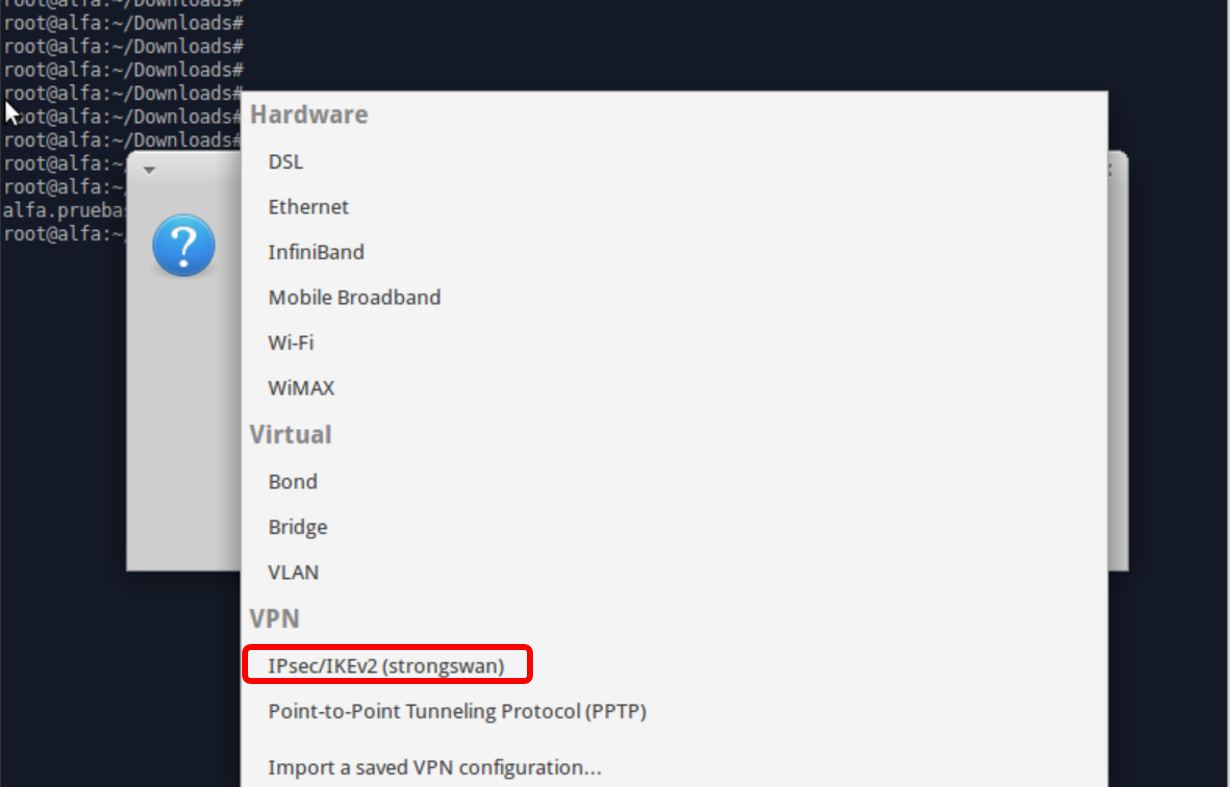
Right-click on the connection icon.

Select VPN Connections -> Configure VPN-> Add -> IPsec/IKEv2 (strongSwan).
In the configuration screen for the new connection, enter required data:
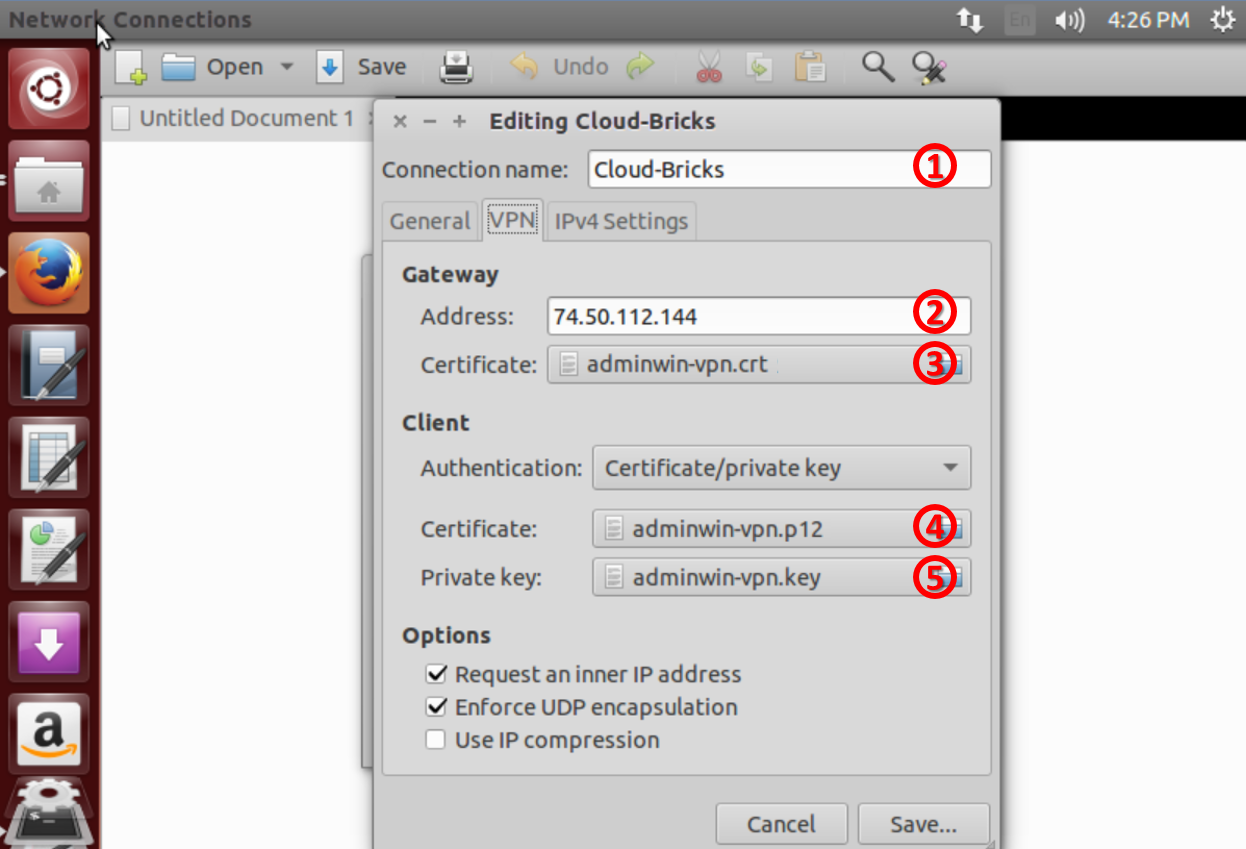
- Connection name.
- VPN server IP address.
- File xxxVPNCA.crt (Certification Authority .crt certificate file).
- File <user>-vpn.crt (User Certificate file).
- File <user>-vpn.key (User private key of the connection).
Save the connection. Then click on the same connection icon and
select the VPN connection created. When trying to connect will
require the password or Shared Key.

The VPN connection is ready. We can try pinging private IP address corresponding to Virtual Machines in the same VLAN we are connected to:

If the connection was not successful, please check that all configuration steps have been performed correctly and then between contact your Administrator.
VPN client on Fedora
Install VPN L2TP support
L2TP protocol support is not included in the default installation
of Fedora, so it is necessary to install the libraries and compile
the connection applet.
The first step is to convert the certificate
<customer>-VPNCA.crt (VPN Certification authority) to
the .pem format:
$openssl x509 -in <customer>-VPNCA.crt -out <customer>-VPNCA.pem
Now install the necessary libraries to compile:
#yum install qt-devel gcc-c++ libtool xl2tpd libtool-ltdl-devel
Download the following packages:
#wget https://launchpad.net/l2tp-ipsec-vpn/trunk/1.0.9/+download/l2tp-ipsec-vpn_1.0.9.tar.gz
#wget https://launchpad.net/l2tp-ipsec-vpn/trunk/1.0.7/+download/l2tp-ipsec-vpn-daemon_0.9.9.tar.gz
Once you have downloaded the files, uncompress them:
#tar xvfz l2tp-ipsec-vpn_1.0.9.tar.gzNow compile and install:
#tar xvfz l2tp-ipsec-vpn-daemon_0.9.9.tar.gz
# cd l2tp-ipsec-vpn-daemonThe applet uses some QT libraries, so you need to create an environment variable QT to run it in, editing the ~/.bash_profile:
# make
# make install
# cd ../l2tp-ipsec-vpn
# make
# make install
# cd ..
# mkdir -p /etc/ipsec.d/certs /etc/ipsec.d/private /etc/ipsec.d/cacerts
$echo "export QT_GRAPHICSSYSTEM=native" >> ~/.bash_profileIt is highly recommended to include the variable also in the file /etc/profile
$sudo echo "export QT_GRAPHICSSYSTEM=native" >> ~/etc/profileThen restart the computer, the applet should start automatically, otherwise you must execute the following command:
$nohup L2tpIPsecVpn &

- To create the VPN connection, right-click the highlighted icon and choose the "Edit connections" option.
- It will ask for the root password (It is important to select the "Remember password" option).

Click on the Add button to add a new connection. Enter the data as follows:
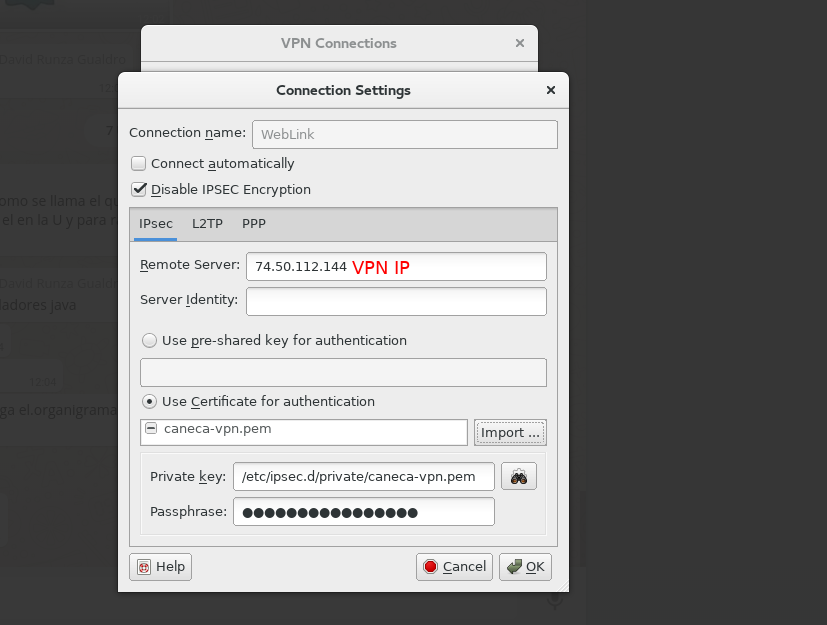
Select the second option "Use Certificate for authentication," then click the "Import..." button to import certificates.
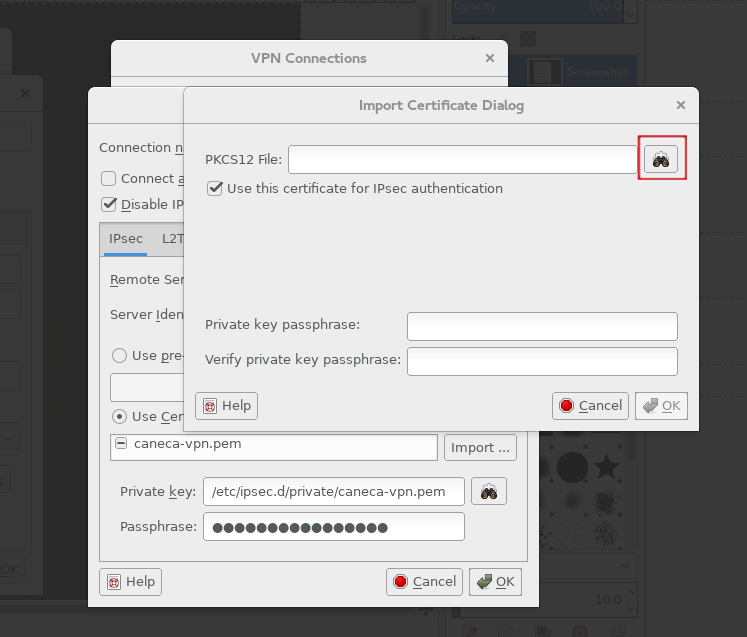
Click on the highlighted icon, and look for the certificate <user>-vpn.p12 (user certificate for VPN connection), and then type the VPN user password:
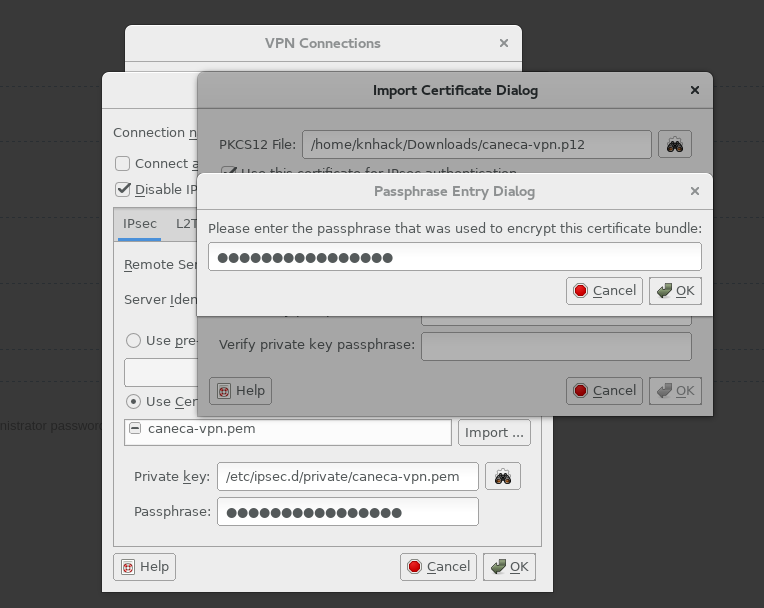
This way the user certificates are imported.
Back into the VPN connection Window, go to the "PPP" tab, make sure the "Use Extensible Authentication Protocol EAP" is selected:
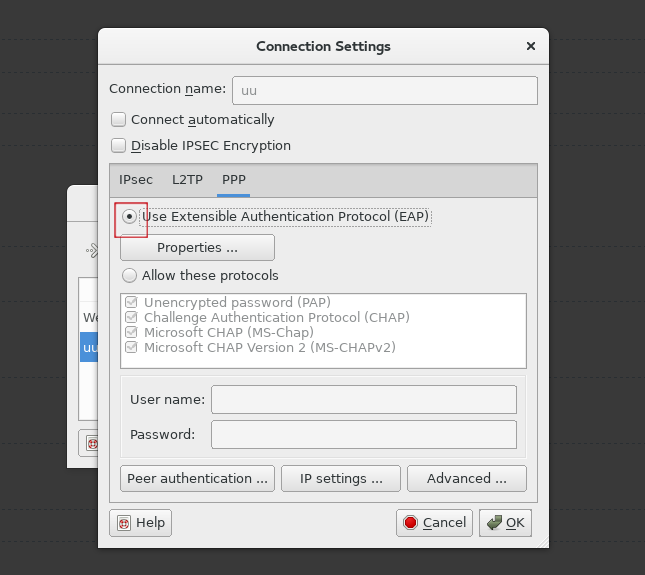
In the same window, click on the "Properties..." button to load the certificate <customer>-VPNCA.crt (VPN Certification authoritys) in .pem format:

Click on OK, then OK again. You have created the VPN connection. To logon, click on the connection icon:

Select the connection. When it manages to connect to the VPN, icon will change:

And the VPN connection is ready. We can try pinging private networks 10.80.x.x
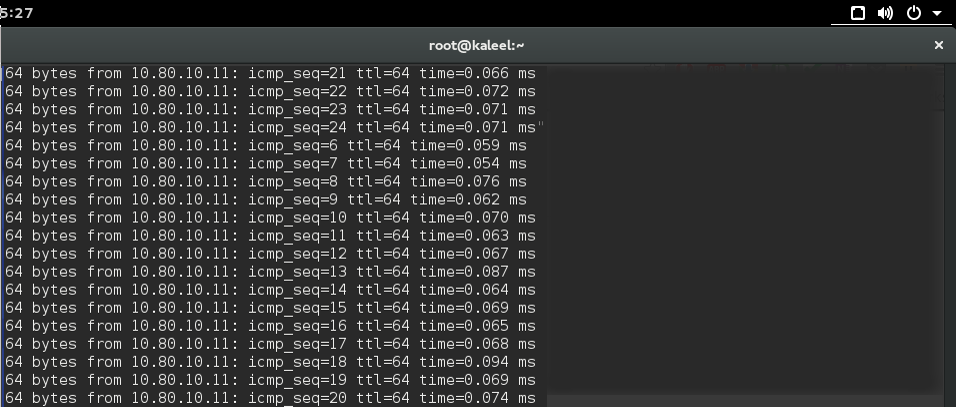
If the connection was not successful, please check that all configuration steps have been performed correctly and then between contact your Administrator. More information here.
VPN connection from LXDE
We need to install the XL2TPD package:#apt-get install strongswan network-manager-strongswan xl2tpd
During the installation process Openswan asks to configure a x.509 certificate, select "No".

Open the new "L2TP IPSec VPN applet" application, an icon is created in the system tray.

Right-click on the highlighted icon, and select the "Edit Connections..." option.
It will open a new window, click the "Add..." button. Type a name for the connection:

Enter the VPN server information. Be sure to select the "Use Certificate for authentication" option.
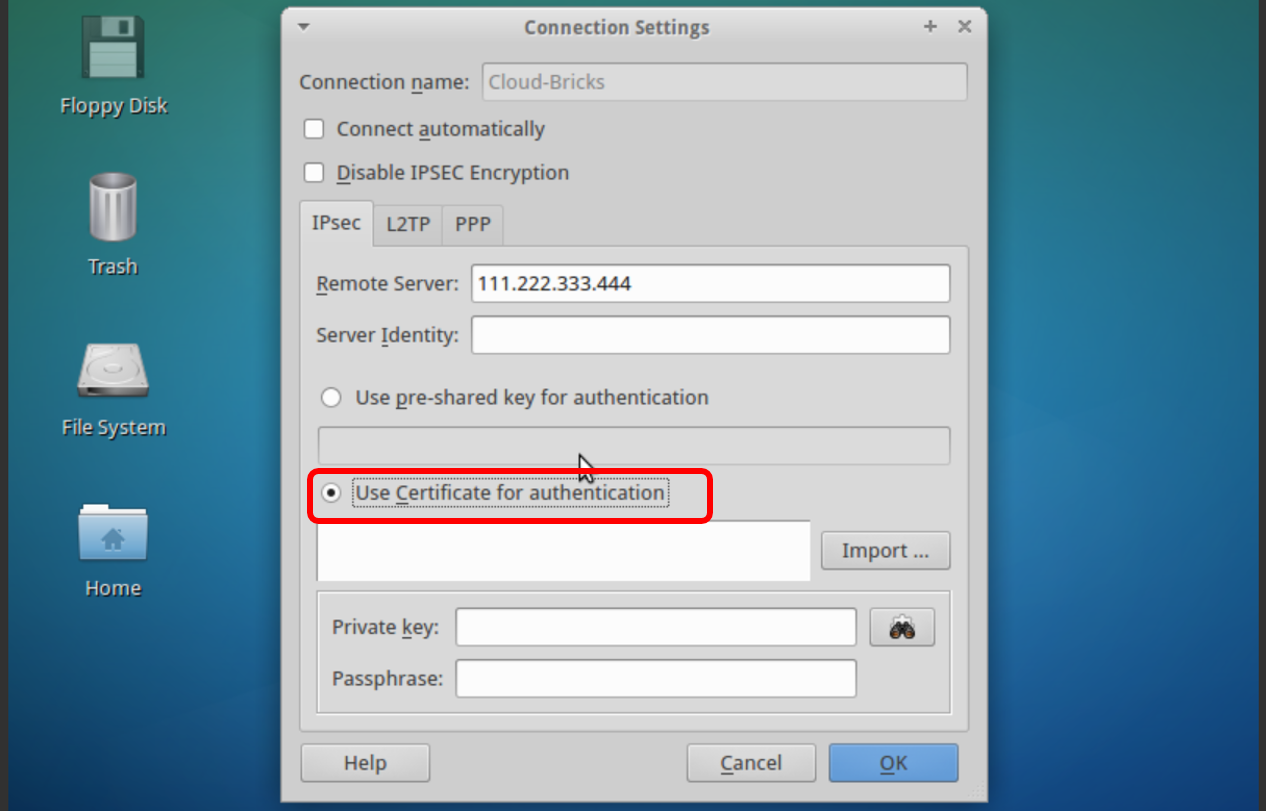
Click on the "Import" button... and import the user certificate (*.p12)
It will ask for the VPN user password.
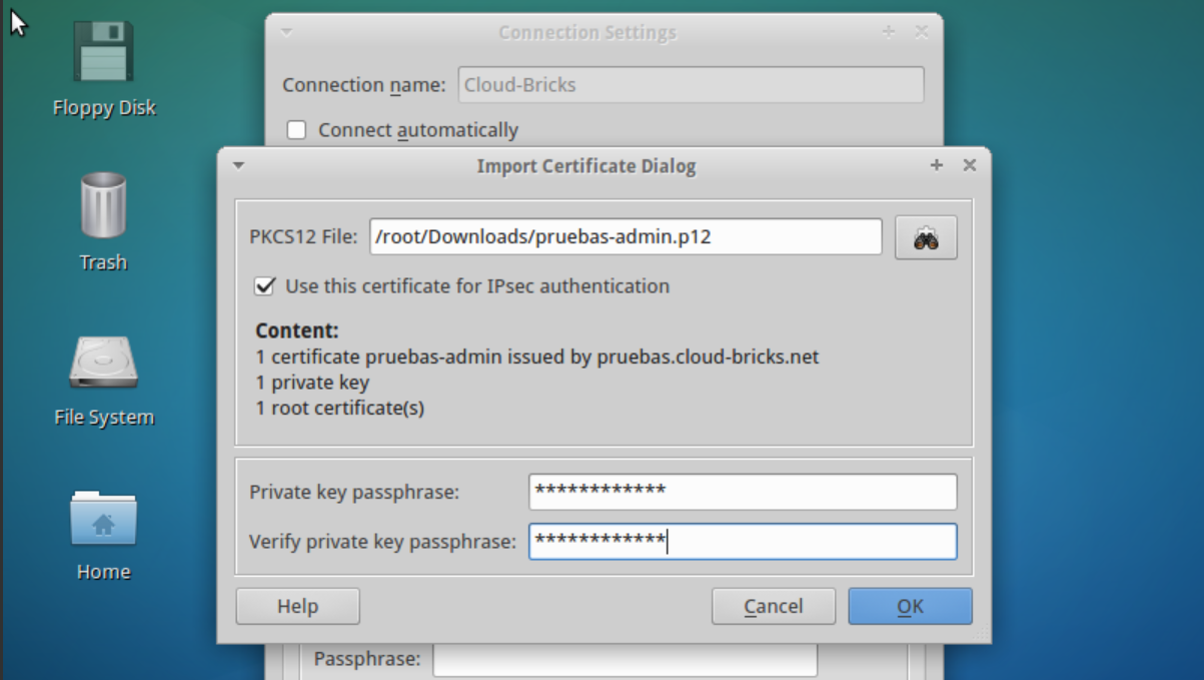
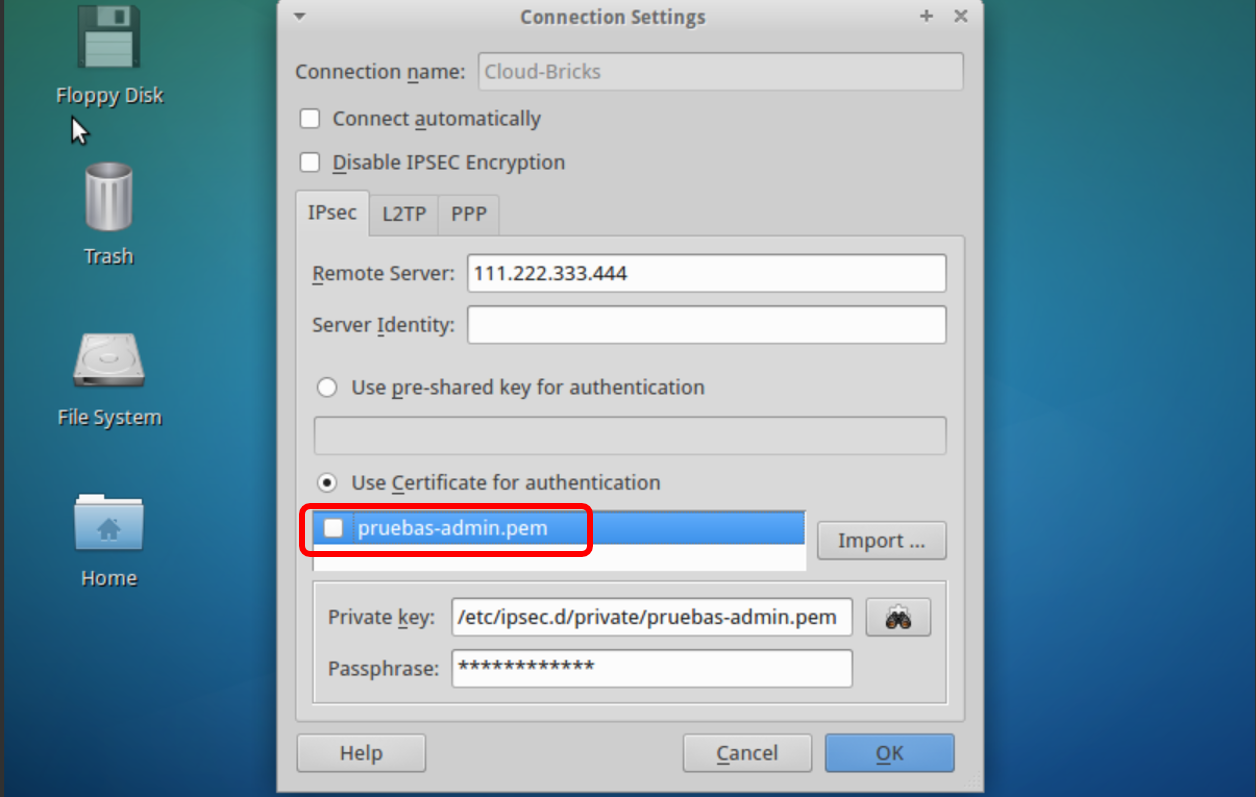
The certificate is now loaded.
Switch to the "PPP" tab, select the "Allow These protocols" option, then enter your VPN username and password.
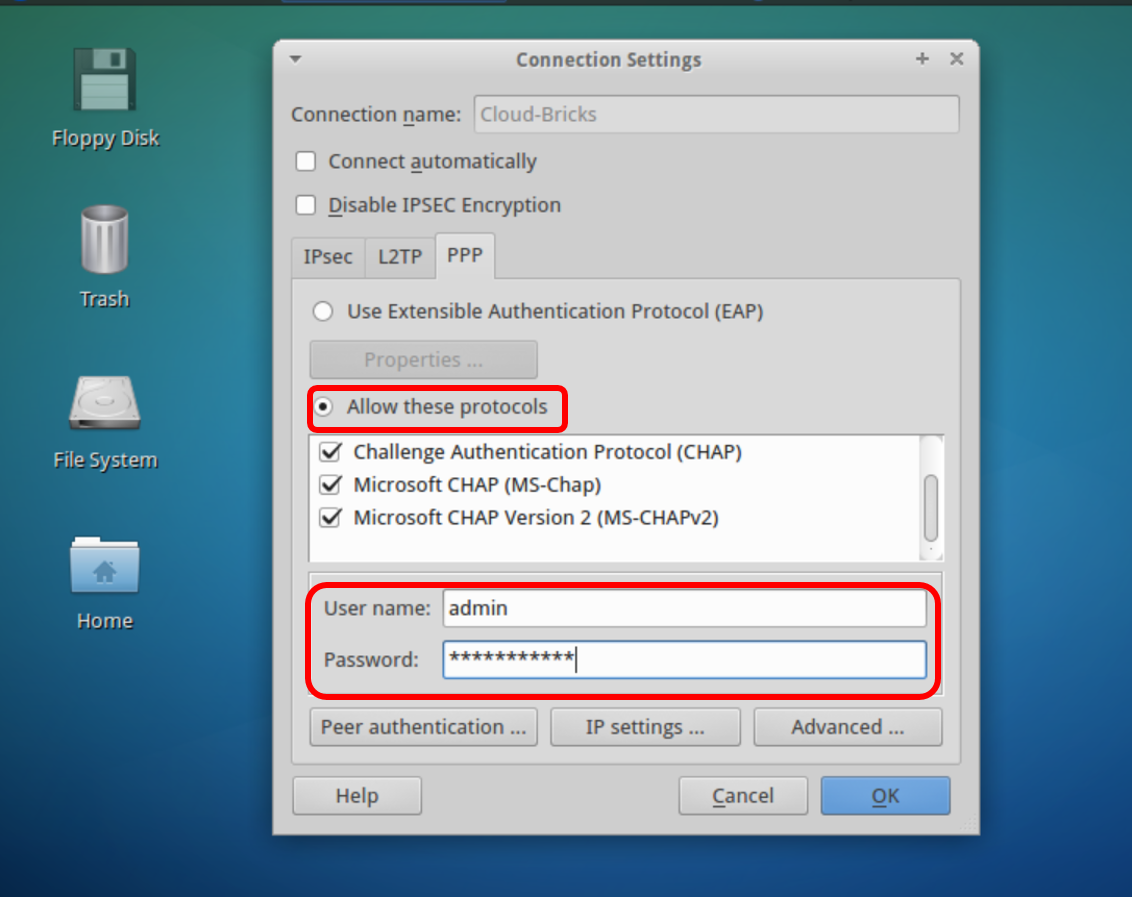
Click on the "Advanced" button .. then load the CA certificate (certification authority).
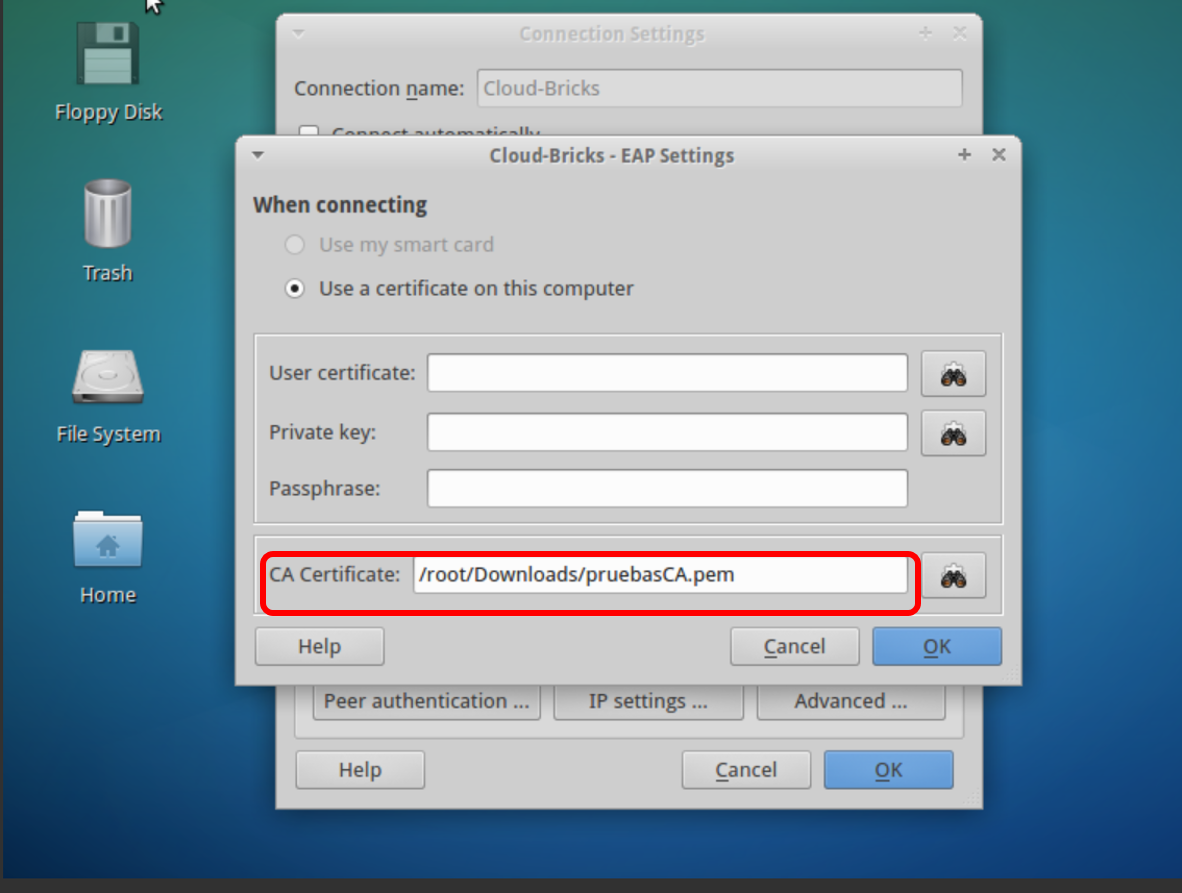
Click on OK and close the windows. The VPN connection is ready.
You can now connect to virtual servers in the same VLAN by using private IP network addresses 10.X.X.
If the connection was not successful, please check that all configuration steps have been performed correctly and then contact your Administrator.